Introduction
If your WordPress site is large and complex enough to require Solr, you’re also probably using the Advance Custom Field plugin or WordPress custom fields. However, you’ll find that Solr doesn’t index those fields by default; you’ll need to add them to the schema.xml file.
Pantheon’s Solr Power plugin is the most common WordPress solr plugin, and these instructions assume that you are using it for your Solr implementation.
Looking for the fastest way to enhance your WordPress on-site search?
Our no-code search solution will drop in to your existing website.
Get a Free Demo- Plug and play: no complex configuration
- Search-as-you-type
- ChatGPT integrated search
- Manually adjust results ordering
The schema.xml file
The schema.xml file in Apache Solr plays a critical role in defining the structure and characteristics of the data that the Solr search engine will index and make searchable. It serves as a blueprint for how the data should be stored, processed, and queried within Solr.
In essence, the schema.xml file acts as a pivotal configuration hub that influences how Solr interprets, indexes, and retrieves data. By customizing this file to align with the data’s nature and the desired search behaviors, users can optimize Solr’s search capabilities and create effective search experiences for their applications. It’s worth noting that while the schema.xml approach was the traditional method for schema definition, Solr has introduced a more flexible and expressive alternative called the Schemaless Mode, which allows for dynamic schema generation based on incoming data.
Create a copy of the schema.xml file
In the folder wp-content/plugins/solr-power there should be a file called schema.xml. Copy this file to somewhere you can easily edit it.
Adding an Advance Custom Fields field to WordPress Solr schema
In the copy of schema.xml, make the following changes:
In the <fields> section, add:
<field name="YOUR_FIELD_NAME_GOES_HERE" type="text" indexed="true" stored="true"/>
and:
<copyField source="YOUR_FIELD_NAME_GOES_HERE" dest="text"/>
<copyField source="YOUR_FIELD_NAME_GOES_HERE" dest="spell"/>
Upload the new schema.xml
Upload the schema.xml file to the folder files/solr-for-wordpress-on-pantheon . This is usually best done through SFTP
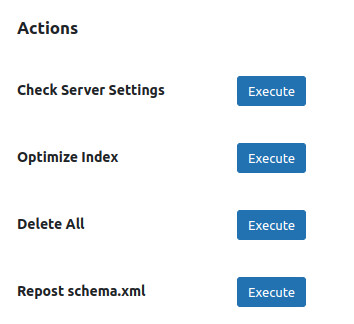
Repost the new schema file
Go to the Solr Power settings in the WordPress backend and click “execute” next to “repost schema.xml”
Reindex the site
I’ve found that reindexing the site through the WordPress backend isn’t as reliable as using terminus. The following terminus command will reindex the site; replacing yoursitename and yourenvironment name with the correct values for your Pantheon site.
terminus wp yoursitename.yourenvironmentname -- solr index